
Catching a glimpse of the aurora borealis is on most traveler’s bucket lists. Witnessing the northern lights dancing across the sky is truly a sight to behold. But seeing this magical phenomenon in person is not exactly a walk in the park, even with the aurora’s ever increaseing reach south.
For the best chances to see the northern lightts, you need to get to a polar region, then you need the right combination of solar winds, clear skies, and good luck among other things. But I’m here to help, so in this post we will go through the top 10 tips for seeing the northern lights.
Northern Lights Basics
You can skip right to the northern lights tips here, but let’s start with a few basics first.
- The Top 10 Tips for Northern Lights Viewing
- Tip #1: Manage your expectations
- Tip #2: Stay longer if you can
- Tip #3: Understand the Kp Index
- Tip #4: Download an aurora tracking app on your phone
- Tip #5: Plan your trip for a new moon and get away from town
- Tip #6: Dress appropriately and use hand and feet warmers
- Tip #7: You can sleep when you’re dead
- Tip #8: If the clouds are thick, it’s not worth it
- Tip #9: Invest in a good camera
- Tip #10: Know that your eye won’t see it as clear as your phone will
- Bonus Tip: Drive yourself around
Note: this article contains affiliate links, which means that should you purchase something or get a quote through them I may make a small commission at no additional cost to you. This helps keep the site running with up to date information. I do not represent any of the affiliates I link to. This is information only and not a recommendation to buy the product mentioned in this article.
What are the northern lights and what causes them?
The aurora borealis – more commonly known as the northern lights – is a phenomenon that occurs near the earth’s poles caused by collisions of electrically charged particles from the sun in the earth’s atmosphere (woo science!). These little collisions form colorful lights in the sky that are constantly moving. We can go on forever about the science behind the lights but that’s the gist of it.
Colors of the northern lights
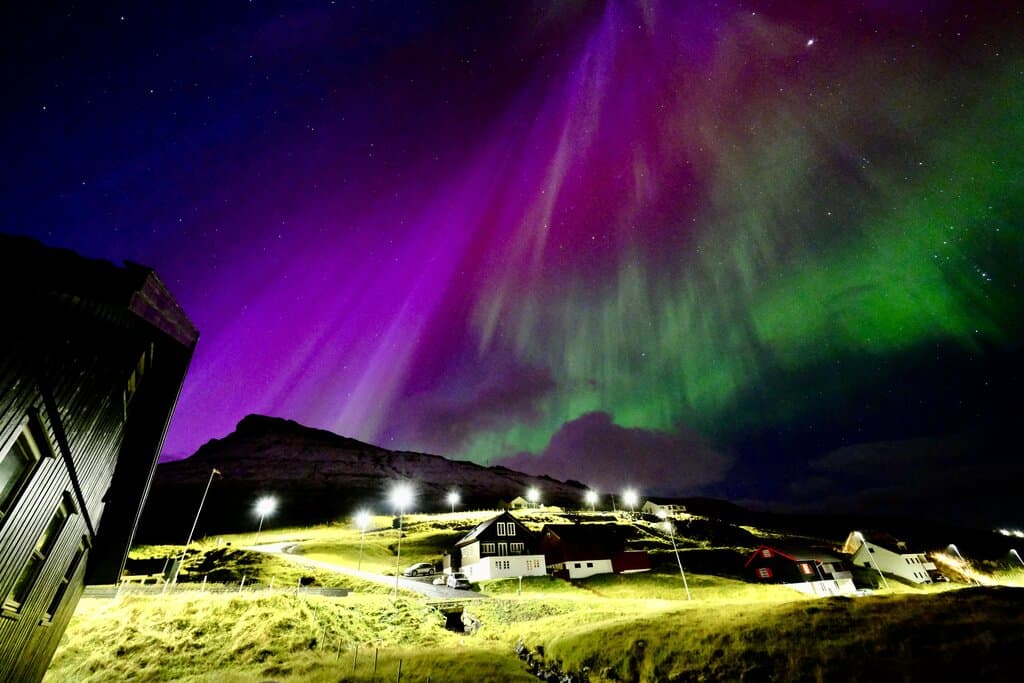
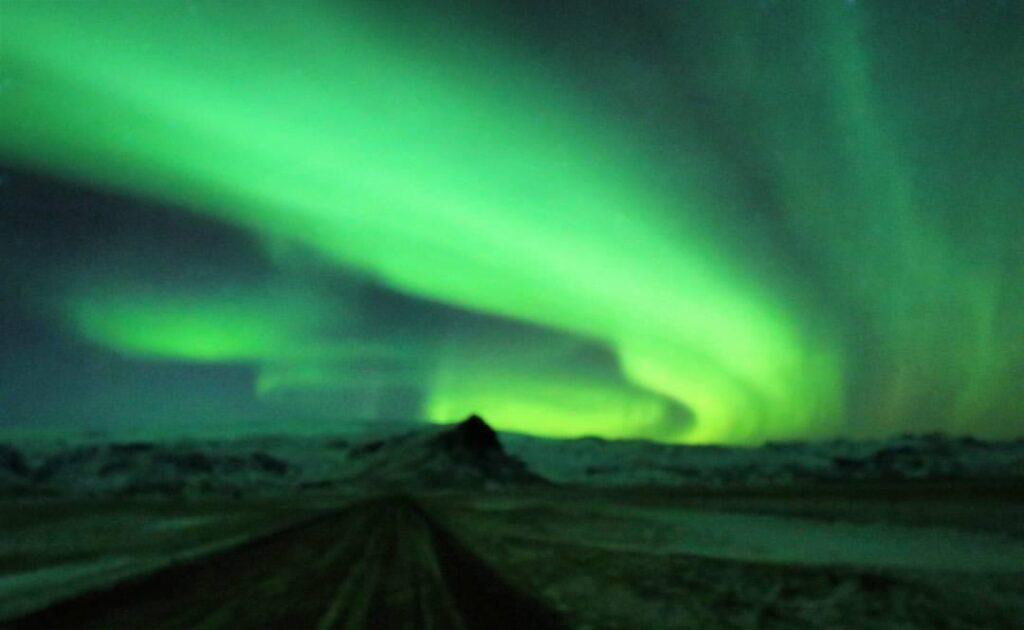
By far the most common color that the northern lights show up as is green. If you’re seeing them for the first time, chances are you’re going to see green. After green, the next most common colors are shades of purple, red, and pink. If you see colors other than green, you should be thrilled because that means that you’re getting a sensational northern lights show.
Where can you see the northern lights?
The northern lights are concentrated around the north pole and are typically contained within a latitude of about 63 degrees (meaning they are typically seen north of 63 degrees). But there is no set boundary of where they can occur.
The northern lights are often spotted in places like Michigan and Montana a few times a year. 2023-2026 is an especially active time for solar activity and the northern lights have been commonly appearing in places as far south as Arizona, Georgia, and central Europe up to 3 or 4 times per year.
This solar activity won’t last forever, so pay attention to the news. Most local news outlets are good about reporting when the northen lights will be visible in their region. Ironically, in the largest solar storm we’ve ever had in October 2024, where the northern lights were spotted in my hometown of Washington DC, we happened to be up in the Faroe Islands. So we got an amazing solar show, but it was kind of disappointing to have missed it in our own backyard.
At the opposite end of the earth, the southern lights – the aurora australis – are the exact same thing for the South Pole. They’re just harder to see as there are very few people in Antarctica in the winter. They do appear in the south of New Zealand, Tasmania, and Patagonia though, especially 2023-2026 due to the increased solar activity.
You can see where the auroras are at any time by checking out the National Oceanic and Atmospheric Administration’s aurora map.
When do the northern lights appear?
If the solar activity is high, the lights are pretty much always there. It’s not like they only appear at night. It’s just that you need dark skies to see them so you just can’t see them until well after the sun sets. And since the polar regions experience the midnight sun in the summer, for a serious chunk of the year you literally do not have dark skies to see the northern lights.
That’s why if you want to see the northern lights you have to go in the fall, winter, or spring. Depending on how far north you’re going, you’ll be limited to about mid September to mid April.
Keep in mind that the longer the darkness, the more opportunities you have to see the lights. A September visit to Iceland will only have a few hours of darkness per night, whereas a December visit will have about 18 hours of darkness.
Best places to see the northern lights
Not counting strong solar shows when the lights appear as far south as the contiguous United States, Scotland or Ireland, there are eight countries that you can see the northern lights from:
- United States (Alaska)
- Canada
- Iceland
- Denmark (Greenland)
- Norway
- Sweden
- Finland
- Russia
You might be able to include the Faroe Islands on the list, but it’s not common enough to base a northern lights trip there. Plus the weather in the Faroe Islands is usually downright awful. We did see amazing northern lights in the Faroe Islands, but we got really lucky with the weather. If the goal of your trip is to see the northern lights, your destination must be within one of these eight countries.
Of the countries above, I have always had the best luck in Iceland, especially the far north near Akureyri, but really anywhere in Iceland is ideal for a northern lights focused trip. The weather is variable, leading to solid chances for at least some clear skies. The aurora also always seems to go right over Iceland almost every night, so northern lights shows are common.
Each country listed above has their own benefits, though. Assuming you’re not going to Siberia, some of the other best places to see the northern lights outside of Iceland are the Lofoten Islands (Norway), Abisko (Sweden), Rovaniemi (Finland), Yellowknife (Canada), and around Fairbanks (United States). Greenland is also a great place to see the northern lights, but too difficult to get to for most people, especially in winter (FYI United is starting direct service to Nuuk, Greenland from Newark in 2025).
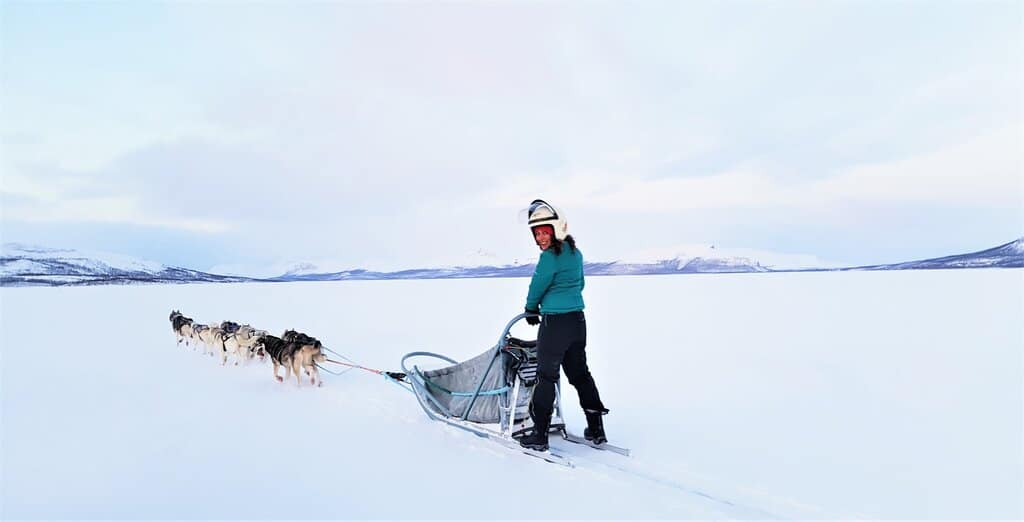
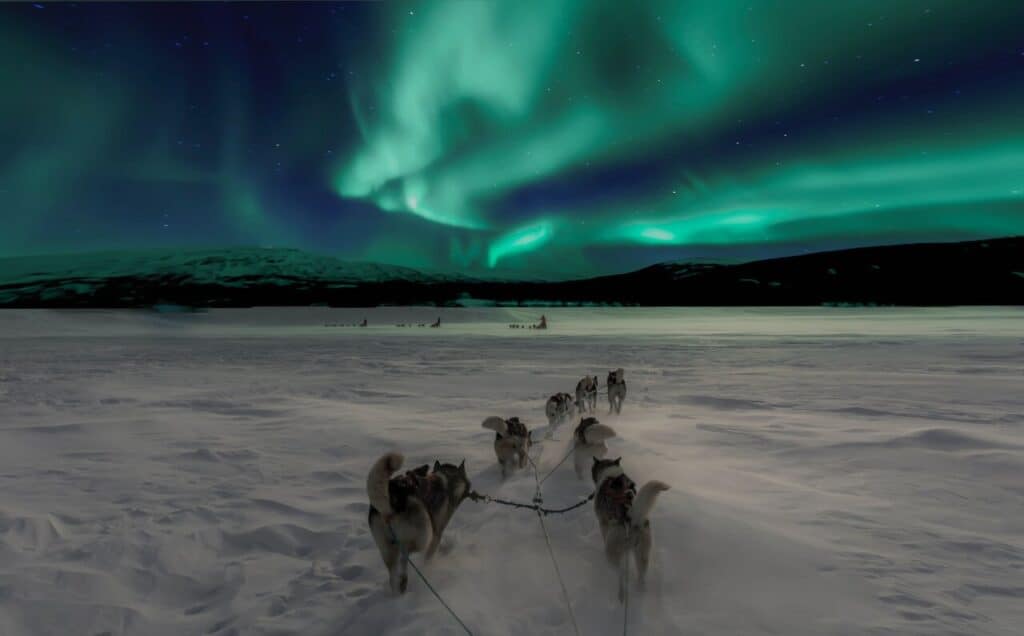
When making a northern lights trip, it’s important to also go somewhere that has activities for the daylight hours. For that, Iceland also takes the cake. But places like Lapland, Finland and and northern Norway are also great. Fairbanks and Yellowknife are not quite as good for that, but still offer fun winter activities like dog sledding and snowshoeing.
Cost of a northern lights trip
If there is one thing in common about all the countries you can see the northern lights from, it’s that they are expensive places to visit. This is not the kind of trip for a backpacker or anyone on a budget. Iceland, Norway, Sweden, the US, and Canada are some of the most expensive places in the world to visit.
The cheapest country on the list – not including Russia – is Finland. Though if you plan to go to the popular destination of Rovaniemi expect prices to be more like the US.
Now the good news is that winter trips to these countries are typically far cheaper than summer trips. A cabin in Iceland in winter is about half of what it costs in summer. You can still find a 2-bedroom cabin in Iceland for under $200 USD per night in winter.
Even Norway – quite possibly the most expensive country in the world – has decent prices on cabins and hotels in the middle of winter. Canada and the US will be a little more expensive than the European countries, but still far cheaper than visiting in summer.
The other thing to factor in is the cost to get to your destination. If you live on the east coast of the United States or Canada, Iceland will be by far your cheapest option. On the west coast? Then Alaska might be where you want to look, though Iceland may still be cheaper (even for Canadians Yellowknife is expensive to fly to).
If you’re from mainland Europe Iceland is also your best bet, as Icelandair flies direct to many European destinations. Getting to northern Scandinavia can be a long journey with layovers in Oslo, Stockholm, or Helsinki. From elsewhere in the world it’s going to be expensive no matter where you go and no matter how you get there.
So in summary, Iceland is the best place in the world to see the northern lights and typically the cheapest destination to get to and stay in. Note that in the discussion below, I use the word “Arctic” to refer to places to see the northern lights, even though many of the destinations – like Iceland and Fairbanks – are not technically in the Arctic.
The Top 10 Tips for Northern Lights Viewing
Without further ado let’s get right into it. Here are my top 10 tips for seeing the northern lights.
Tip #1: Manage your expectations
The most important tip I can give you when going on a northern lights focused vacation is to manage your expectations to avoid disappointment. It is essential that you go into your trip knowing that there is a good chance that you will not see the northern lights. I know that that really sucks, but it’s the mindset you must have to be able to enjoy your trip, even if you don’t see the lights.
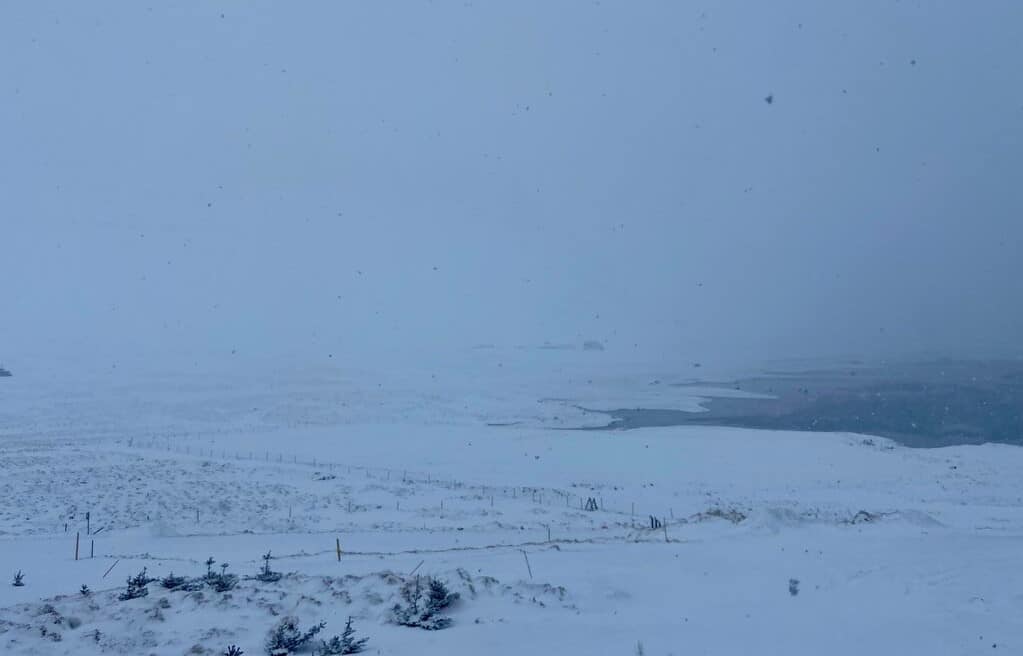
The main reason why you won’t see the northern lights is the weather. Arctic winter weather is not what anyone would describe as pleasant. Skies are cloudy more often than not and endless blizzards are not unusual.
It’s relatively common for there not to be a break in the clouds for weeks on end. And there is nothing you can do to prepare for this (well, unless you are able to book a last minute trip on incredibly short notice).
If you get good weather though, you might be able to see the lights every night. On our first trip to Iceland we got northern lights six out of seven nights. It takes a bit of luck with Mother Nature, but it does happen.
Tip #2: Stay longer if you can
The length of your trip is extremely important to your overall experience. The longer you stay in the Arctic the more chances you have to see the northern lights.
Your expectations should change based on how long you’ll be traveling for. If you’re just going for 2 or 3 days, then I can confidently say do not expect to see the northern lights. You might see them, but you’ll be lucky.
If you’re going for 4-5 days you can reasonably expect to see them one night. Even then, you have to be prepared for disappointment. We’ve done four Arctic trips in this range and on one of them didn’t see any lights at all. And on another five day trip it wasn’t till the last night – in downtown Tromso of all places – that we finally had clear skies to see them.
If you’re going for a week you can expect to get at least one good show. But again, it just totally depends on the weather. We’ve known people who have spent a week in Lapland, Finland and not seen the northern lights even once. Similarly, we’ve had friends go to Iceland for 10 days and have nothing but gray skies and blistering wind.
On top of the weather, sometimes the aurora forecast just isn’t that great and the solar winds are not strong enough to illuminate the sky. See the next section for a full understanding of how to understand aurora forecasts.
In summary, for the best chances to see the northern lights, plan a one-week holiday.
Tip #3: Understand the Kp Index
Before attempting to view the northern lights it’s important to get familiar with the Kp index. The Kp index measures the disturbance of the earth’s magnetic field caused by solar winds. The faster the solar winds, the more disturbance and the greater chance there is for electrode collisions to produce the aurora borealis.
It’s important to note that solar wind and the wind you feel when standing outside on a cold Arctic night are not the same thing at all. Kp forecasts are available online and through numerous smartphone apps.
The Kp index is a ranking system from 1-9. Here I’ll explain in layman’s terms what each number means.
Kp 0-1
Kp 0-1 indicates that the solar winds are low. It’s possible to see the northern lights but unlikely. If you see a Kp of 0 or 1, it’s best to use that time to catch up on sleep unless it’s the only clear night that you have. You might still see them if you’re lucky, but chances of getting a dazzling show are minimal.
Kp 2
Kp 2 is – at least in my experience – the baseline for Iceland, and pretty common elsewhere in the Arctic on most nights. It means that if the skies are clear, you are likely to see the lights. They may not dance across the sky in bright red and pink colors, but they will be visible to the naked eye. If the forecast is for Kp 2 and the sky isn’t completely overcast, it’s worth staying up for.
Kp 3 to Kp 4
Kp 3-4 means that the solar winds are moving faster and there will be more aurora activity in the sky. If the skies are clear do not waste any time and get out there!
Kp 5 to Kp 6
Kp 5-6 means that a minor solar storm is underway. Don’t be confused by the word “storm.” A solar storm is a good thing! You’ll likely see more than the typical green light. Bright red and purple lights are definite possibilities and the lights are likely to dance across the sky in all sorts of patterns. If you see a Kp index this high in your forecast, consider yourself lucky and pray that the clouds are not thick.
Kp 7 to Kp 9
Kp 7-9 means that the solar storm is intense. People living in the UK and places like Michigan and Minnesota are probably gonna see the northern lights, potentially even further south into the Netherlands, France, Arizona, etc. Kp forecasts this high are rare though. It happens a few times every year, but don’t expect to get this lucky on your trip.

Tip #4: Download an aurora tracking app on your phone
Now that you understand what the Kp index is, it is essential that you download an aurora tracking app on your smartphone. There are a number of apps that will give you the Kp index and a map of solar activity. I use My Aurora Forecast. The app will also give you the cloud cover forecast and an aurora map.
The biggest challenge will be having cell service to load the app. When you’re hunting the northern lights in rural Iceland or Norway, the mobile coverage is spotty at best. And if you don’t have roaming you’ll only be able to check it from the wifi at your accommodation. Do NOT forget to check the app before heading out to see the northern lights.
Tip #5: Plan your trip for a new moon and get away from town
You want the skies as dark as possible for the northern lights. A full moon can make the lights dimmer or prevent them from being seen completely, especially if the Kp index is 2 or lower.
If you can, plan to visit the Arctic when there is as little moonlight as possible. You can check the moon phases here. This is not to say that you won’t see them if it’s a full moon, but your chances are better in a new moon.
Similarly, you’ll ideally want to get as far away from light pollution as possible. Any light in the sky can obscure the northern lights, so get in your vehicle and drive as far away from a city or town as you can.
That’s not to say that you won’t see them from a city. I’ve seen one of the most memorable light shows from a rooftop in downtown Tromso. And northern lights often appear over the city of Reykjavik in Iceland. You’ll just have better chances to see them with darker skies, so keep that in mind.
Tip #6: Dress appropriately and use hand and feet warmers
While you can sometimes see the lights from the comfort of your heated car or cabin, you’re going to be outside a lot on a night of aurora hunting. As you can imagine, you will need to dress for the occasion. Wear multiple layers and make sure all body parts are covered except your face. Even then, a ski-mask might be warranted on some especially windy nights.
You will need thick winter gloves, but you will also need thinner touch-screen gloves that will allow you to comfortably operate your camera. The thin gloves won’t do a whole lot more than keep you from getting frostbite, and your fingers will still be freezing, but they are better than nothing. We also use hand and feet warmers that we put in our gloves and socks to keep our extremities warm.
If you ever lose feeling in your fingers or toes go immediately back into the car! Seeing the northern lights is not worth getting frostbite for!
Where you are seeing the northern lights also matters here. If you’re in Iceland or Norway, chances are you are on the coast and the temperatures don’t actually get that cold. Think a little below freezing.
If you’re in Alaska or Canada though, it will likely be far colder. You’re not getting me outside in -20 degree temps in Fairbanks. Nope. Parts of interior Finland and Sweden can also be awfully cold, so prepare accordingly.
Tip #7: You can sleep when you’re dead
The best lights often appear in the wee hours of the morning. If the skies are clear and the aurora forecast is high, you should consider staying up late to search for the lights. Chances are the next night will be cloudy so you can catch up on sleep.
Tip #8: If the clouds are thick, it’s not worth it
Building on Tip #7, if the sky is completely overcast, you probably want to cut your losses and enjoy some sleep. As many times as I’ve wanted to think “the clouds will break”, I’ve never actually seen the lights on a night that started out completely overcast.
Now don’t get me wrong, if there are patches of clouds here and there and you can see a star or two, that’s different. It means the clouds are moving and you’ll likely get some clear skies. But if it’s just a constant overcast sky, your chances of seeing the lights are about zero. If the weather isn’t cooperating, get some sleep and hope for better weather tomorrow.
Tip #9: Invest in a good camera
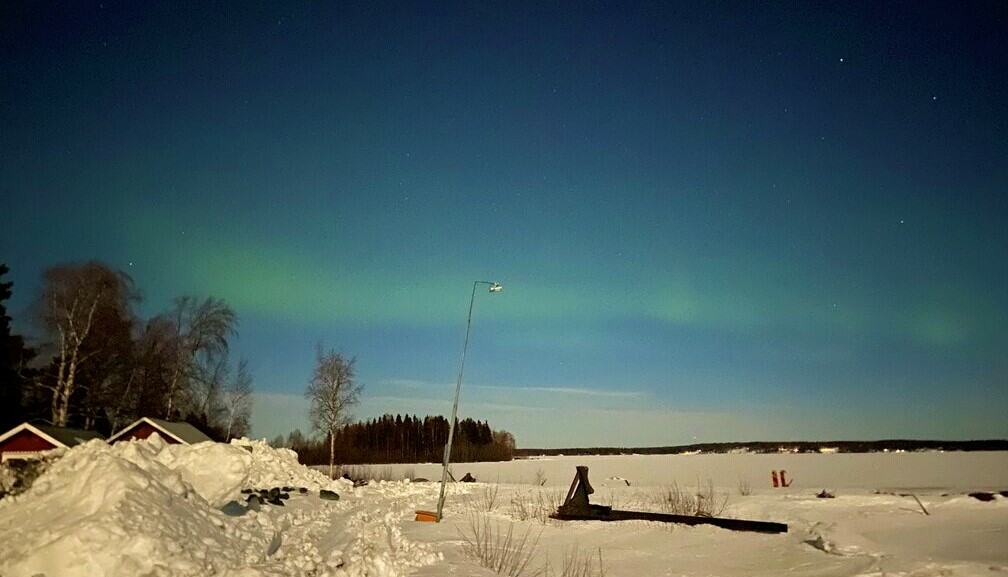
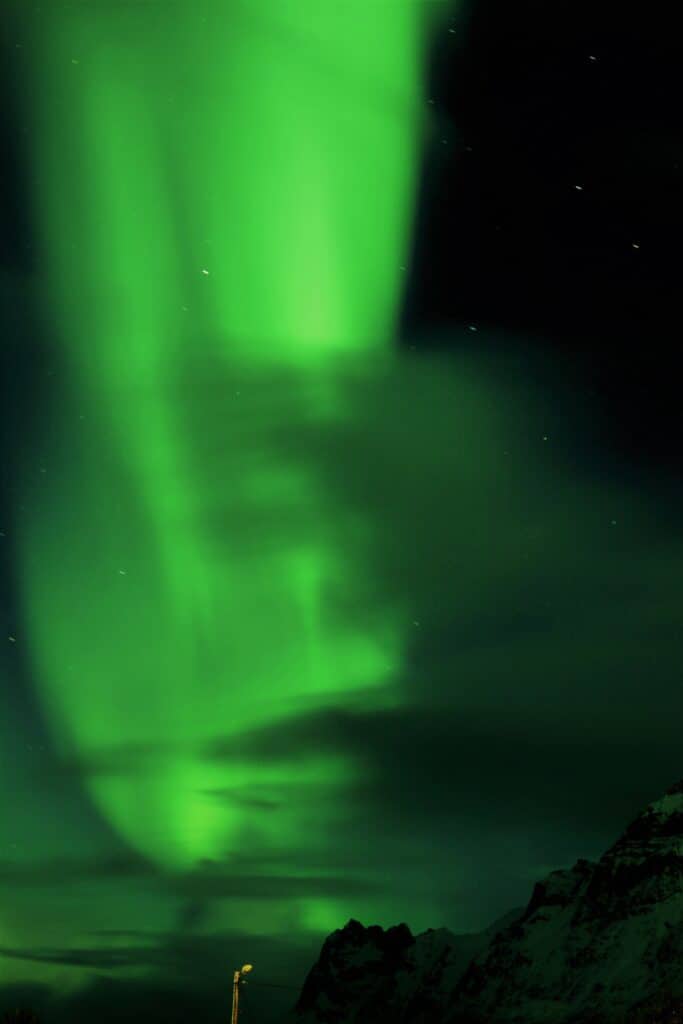
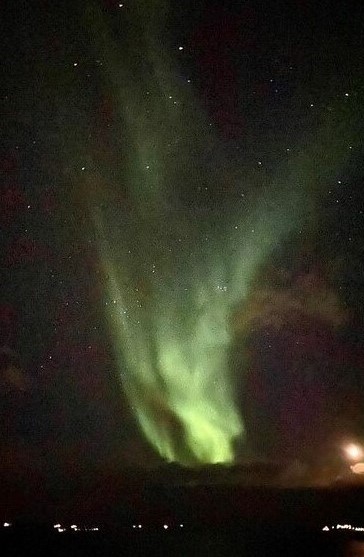
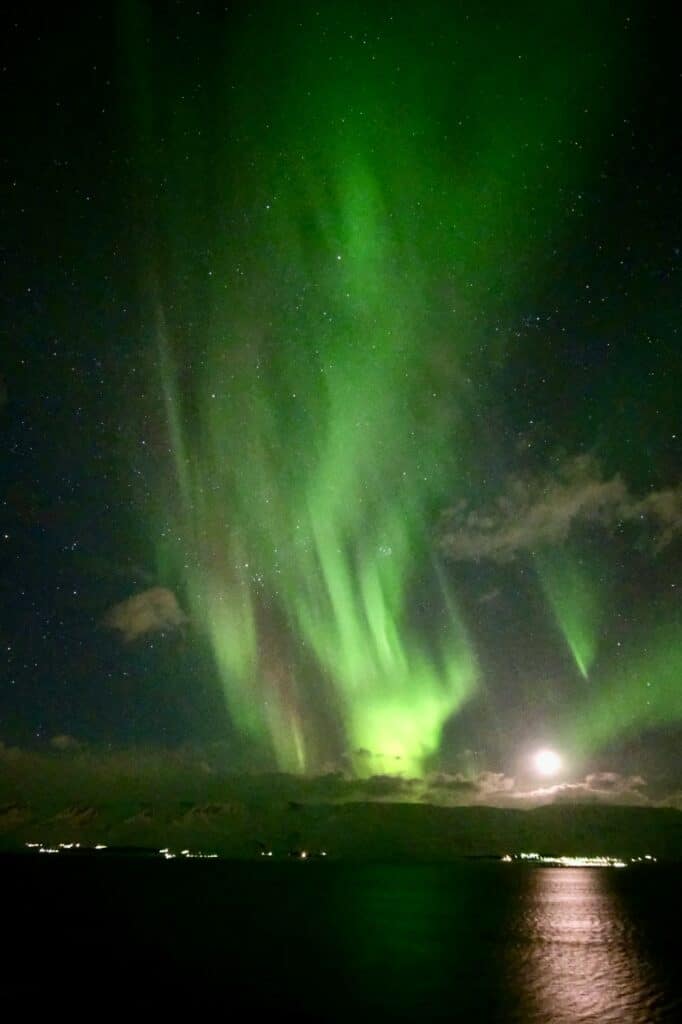
If you want seriously good photos to show to your friends back home and make them jealous, you’ll want to invest in a quality digital camera. While I have some great photos from my phone, you can see the difference below in the phone photo versus the camera photo. A good camera with the required night photography settings will cost you at least $1000, with the better ones in the $2000-3000 range, or more.
Northern lights photography
While smartphone cameras have come a long way and will clearly pick up northern lights if you keep your hand still, if you’re serious about the northern lights you’ll need a good digital camera to take proper photos.
There are many blogs that go over the basics of northern lights photography, but in general you’ll have to control the aperture and shutter speed for amazing northern lights photos.
A wide-angle lens (24mm or less) with a fast aperture (2.8 or faster) is needed. Set the focus to infinity and the aperture to the lowest possible level, 2.8 or so. Start by setting ISO to 800 and the shutter speed to 20 seconds and from there, based on intensity of the aurora, try different combinations of ISO and exposure to find the ideal combination to capture them bright and sharp.
Shoot the photos in RAW mode so the post processing of the photos becomes easier later on and you won’t lose the quality of photos. Be patient and be prepared to do trial and error, as there is quite a learning curve involved.
For northern lights photography, a tripod is essential. You’ll never be able to hold the camera still enough on your own. The camera will be set to a shutter speed of about 5-20 seconds. Any movement in that time will make the photo blurry. You’ll also want a head torch to shine light on your camera while you’re adjusting the settings so you can use both hands.
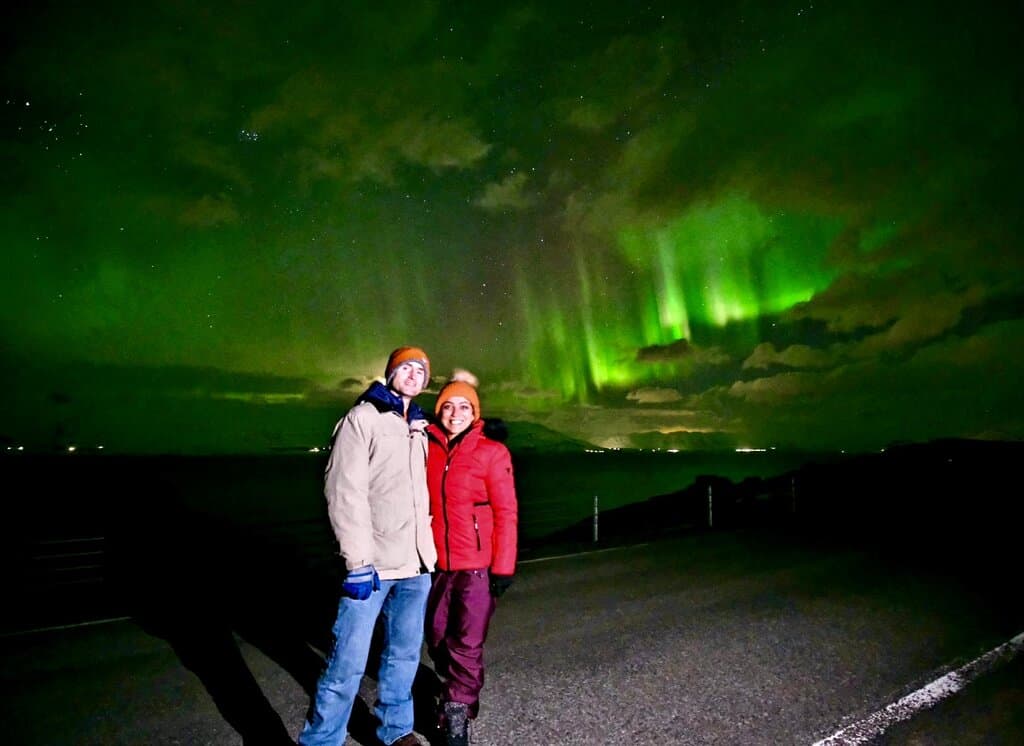
PRO TIP: Want sweet photos of yourself in front of the northern lights? Have someone shine a flashlight on you during the photo. If you don’t do this you will just be a dark blob in the photo as your camera will focus on the lights in the sky and ignore you.
Tip #10: Know that your eye won’t see it as clear as your phone will
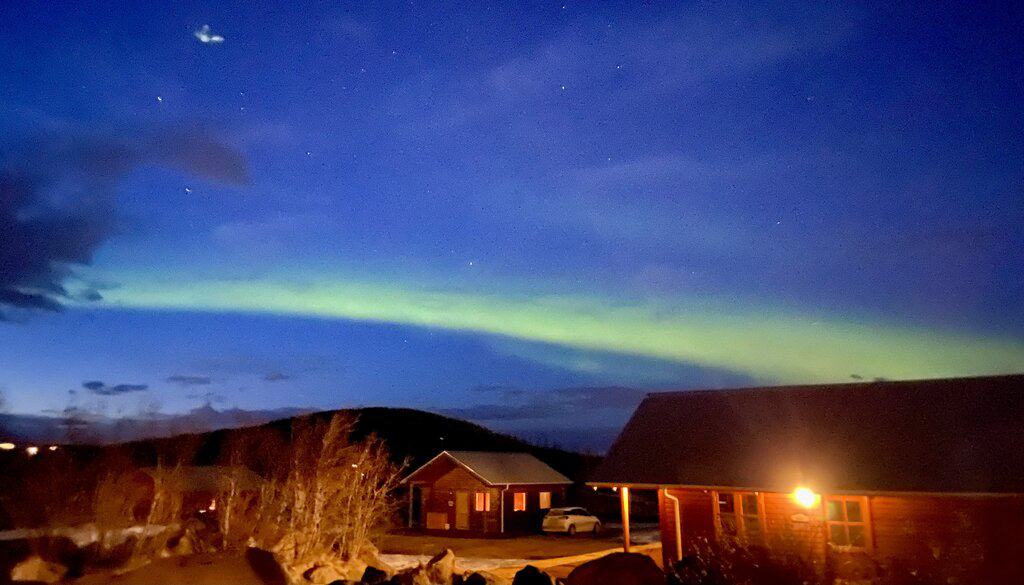
One thing that surprises most people the first time they see the northern lights is that they never really look as green as the photos they’ve seen. This can be a bit of a bummer but is totally normal. Oftentimes what just looks like a random blur in the sky turns out to be a faint aurora. Even if you can’t see any green, your camera will pick it up.
This is not to say that you’ll never see bright green lights in the sky. When the lights are strong they appear very colorful to the naked eye. Especially when they dance across the sky. Even then, though, it will be far brighter on your camera.
If you’re unsure if something you see in the sky is the northern lights or not, take out your phone and point the camera to what you’re seeing. If you see any green on the screen, then you are seeing very dim northern lights.
Just because they are appearing dim now doesn’t mean they’ll stay that way. Most epic lights shows start as a faint blob then evolve into intense colors across the skies.
Bonus Tip: Drive yourself around
The best way to see the northern lights is to have your own vehicle. This gives you the freedom to drive towards clearer or darker skies. You can also stay warm by running the car and keeping the heat on. In order to clearly see and photograph the northern lights you’ll need to be outside. Having a car to warm up in is essential.
Click here to book a great deal on a rental car to find the northern lights!
With all the things you’ve learned by reading this post you should now be an expert in northern lights hunting and not need to go with an organized tour. But if you want the ease of someone else who is experienced in finding the northern lights driving you around and telling you what to do, there are numerous tour options in most major Arctic destinations, especially Iceland.
You can click here to check out northern lights tours in Iceland. Or click below for northern lights tours in other Arctic destinations:
- Norway northern lights tours
- Sweden northern lights tours
- Finland northern lights tours
- Fairbanks northern lights tours
- Yellowknife northern lights tours
Northern Lights Tips – Final Word
Seeing the northern lights is a dream come true. But it’s not an easy or cheap vacation. You have to really want it, and even then you have to be prepared for not getting it. But should you put the effort in and follow all the things you’ve learned reading this post you’ll have the best chances possible to see the magical phenomenon of the aurora borealis dancing across the sky. I wish you luck in your northern lights adventure!